3D Printing at HS3

3D Printing
Our Printers
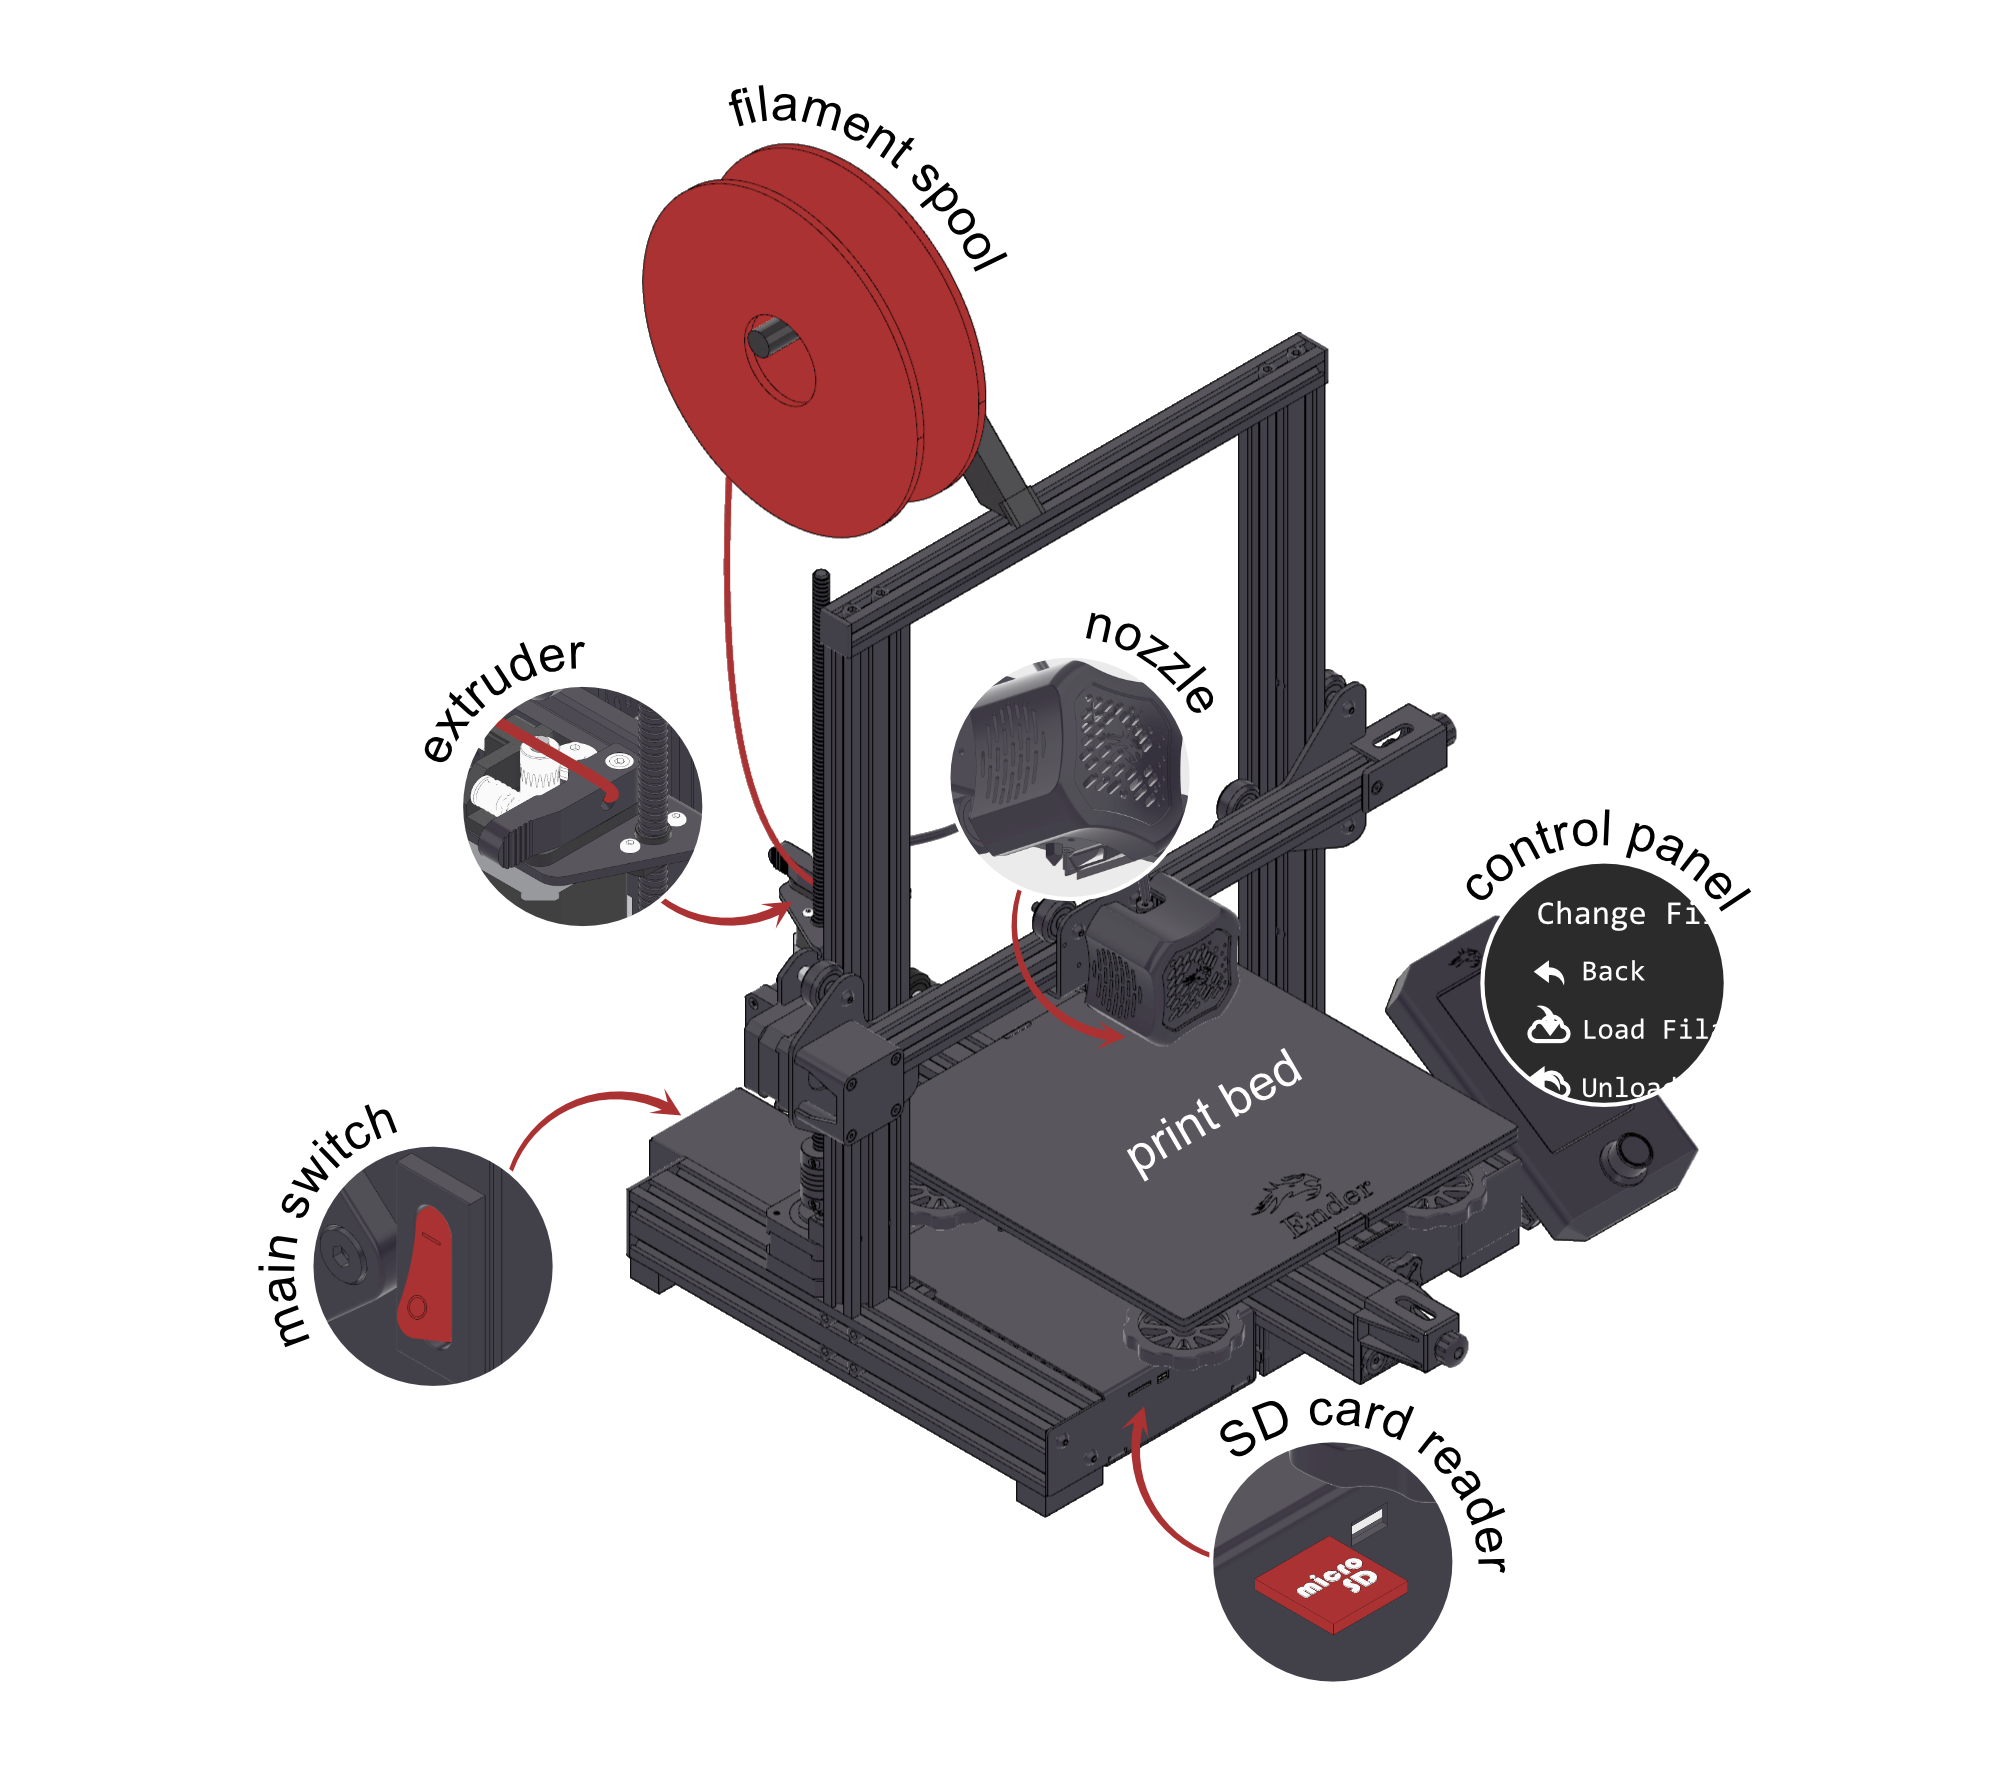
- Creality Ender 3 – a classic, proven printer, ideal for simple prints with PLA/PETG. Status: usually operational.
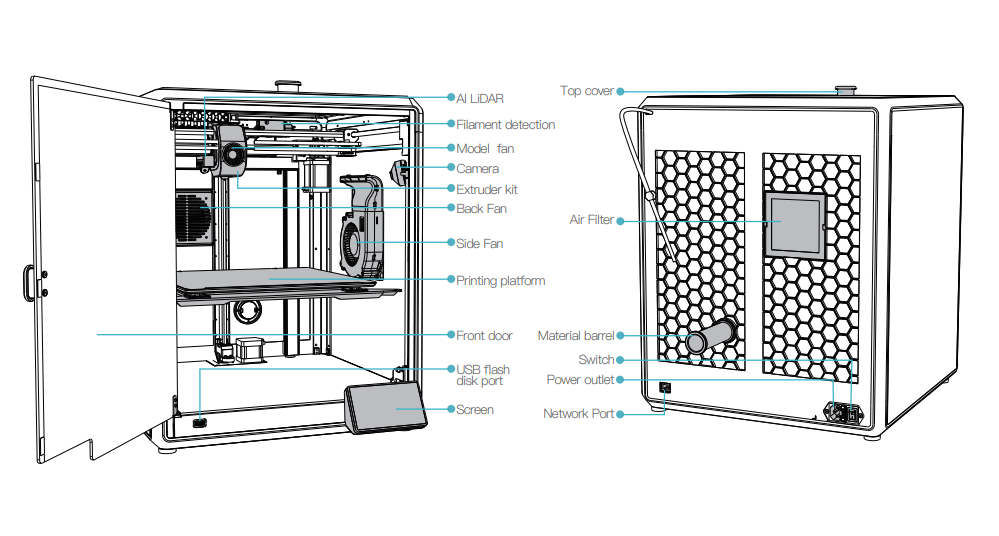
- Creality K1 Max – modern, fast printer with an enclosed chamber, large build volume, supports many materials. Status: usually operational. Files can be sent directly over the network (from OrcaSlicer or via the web panel), no need to use SD/USB cards.
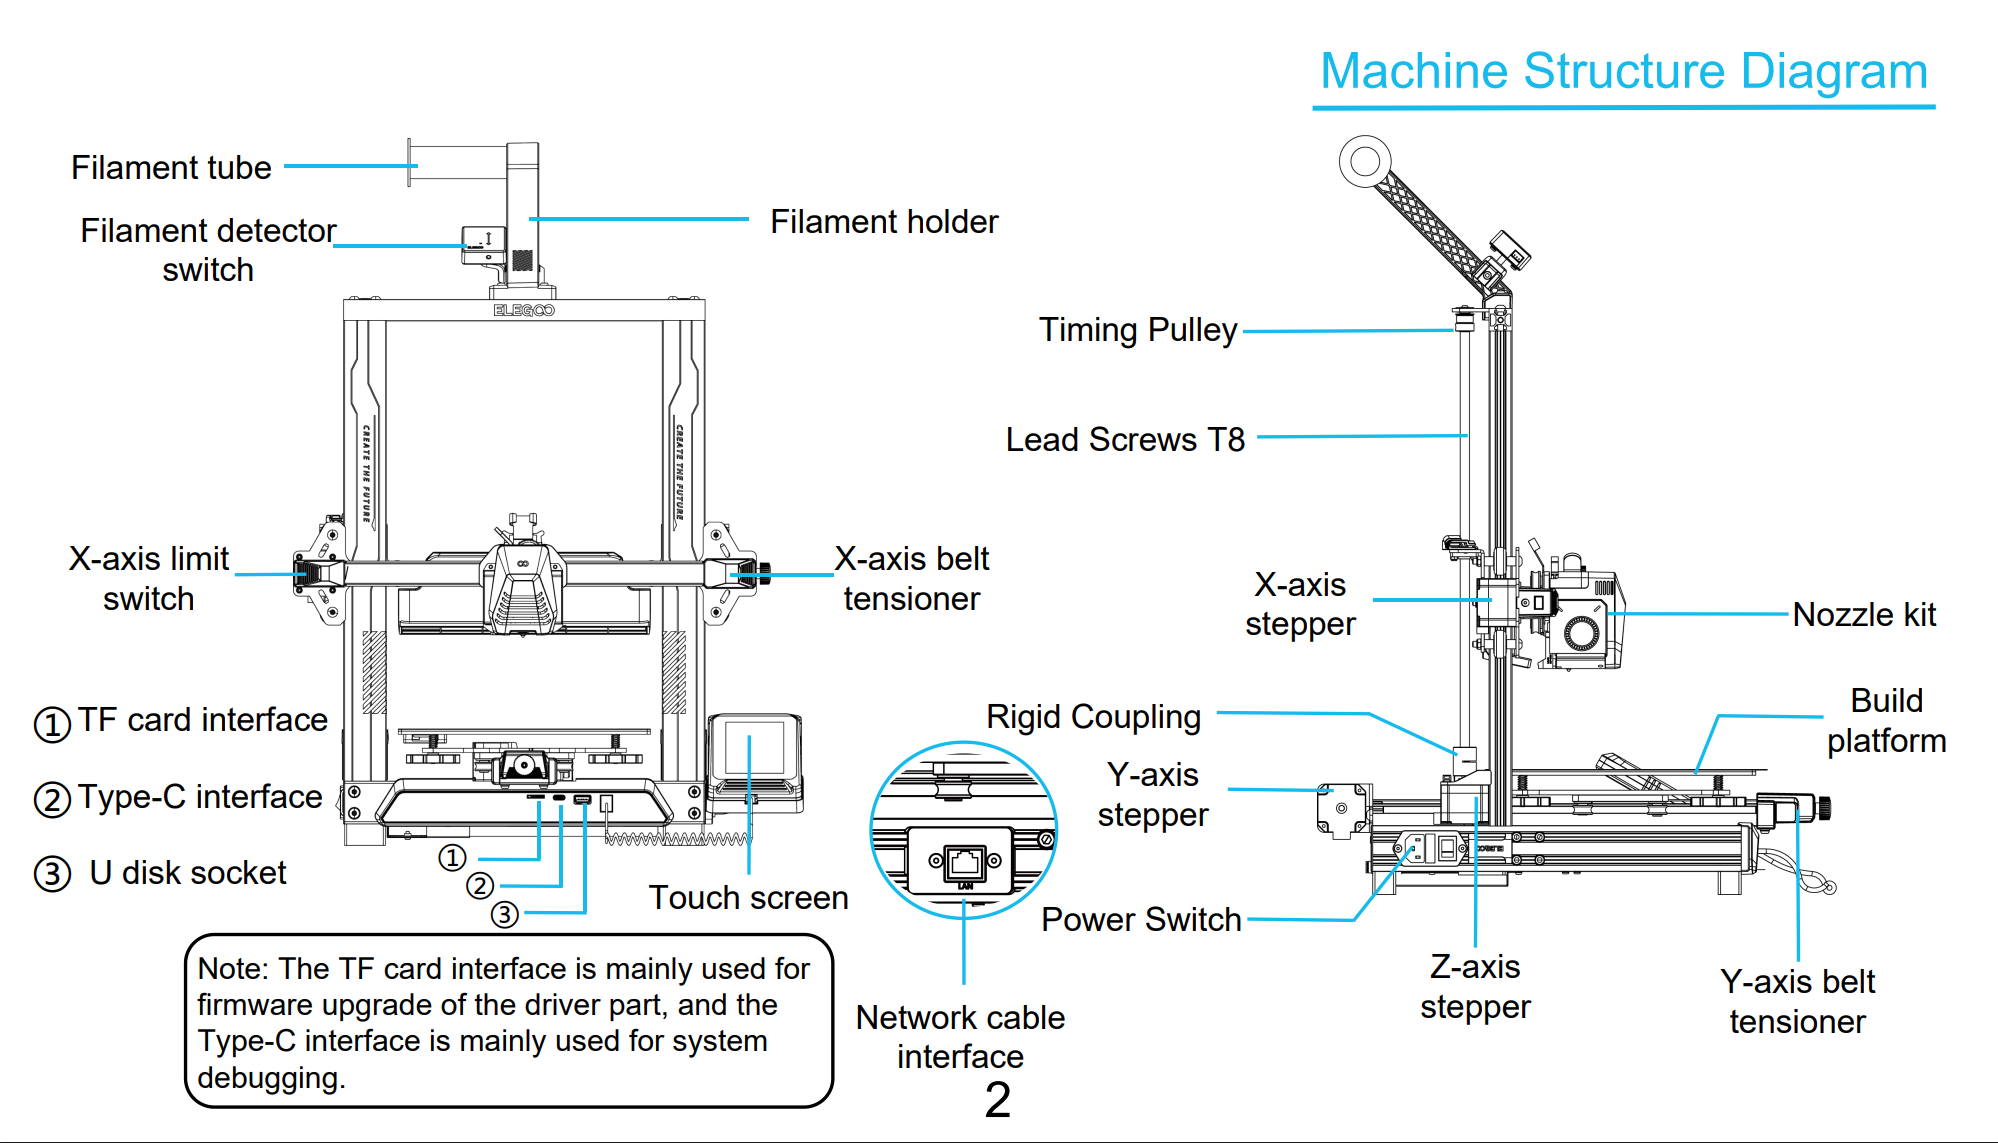
- Elegoo Neptune 4 Pro – fast printer, good for prints and experiments. Status: usually operational.
The current status of the printers is best checked on-site or by asking on Discord – if something isn’t working, leave a note on the #druk-3d channel!
Profiles and Software
On the Hacklab-0x01 laptop, the following are installed:
- OrcaSlicer – main slicer, has profiles for all the above printers (Ender 3, K1 Max, Neptune 4 Pro)
- Ultimaker Cura – configured for Ender 3
- Prusa Slicer – configured for Ender 3
Profiles for all printers are available in OrcaSlicer (select the appropriate printer and profile in the program). If you want to add your own profile – consult with the team!
Preparation
- Copy the STL files you want to print to the laptop, launch your chosen slicer, and place the models on the build plate
- Use the profiles prepared in the slicers; if the settings suit you, slice the model (i.e., create gcode for the printer)
- Check the estimated print time and filament usage; put the appropriate amount into the filament box
- Copy the gcode to an SD/USB card or (for K1 Max) send the file directly over the network
- Note: the microSD->SD adapter has a write-protect switch that tends to move on its own, you may need to set it to the unlocked position
OrcaSlicer
- Select the printer (Ender 3, K1 Max, Neptune 4 Pro) from the profile list
- Load the model, set parameters (you can choose a profile: fast, balanced, precise)
- Generate G-code
- For K1 Max, you can send the file directly over the network (“Send to printer” button); for the others, save to SD/USB card
Prusa Slicer
- Place the object on the build plate
- On the right, find the drop-down list “Printer” (1) and select one of the profiles: FAST, BALANCED, or QUALITY
- Above that, find the “Printer settings” (2) list and select the appropriate layer height for the chosen profile
- Finally, find the “Filament” (3) list and select the appropriate material
- Click “Export G-code” and save it to the memory card
Cura
- Select the printer (Ender 3) from the profile list
- Load the model, set parameters (you can choose a profile: fast, balanced, precise)
- Generate G-code and save to SD/USB card
Loading Filament
- If the printer does not have a spool of filament loaded, you need to do it yourself before printing
- Choose the right type of filament for your needs (e.g., PLA or PET-G)
- Go to the printer settings and find the ‘Load Filament’ option – after selecting it, the printer head will start heating up to the appropriate temperature for the chosen filament
- Cut the end of the filament at a sharp angle – this makes it easier to feed into the extruder
- Place the spool on the holder, release the extruder clip, and start feeding the filament until you feel resistance
- If filament comes out of the nozzle, the process is complete – the printer is ready to work
- If the nozzle extrudes a different color, it may be leftover from the previous filament. Just let it flow until your loaded material comes out
Printing
- Spray the bed with IPA and wipe thoroughly with a paper towel
- Spray the bed with adhesive (e.g., Dimafix) from a distance (it should be a mist, not a soaked bed)
- Turn on the printer (button at the back, left or right)
- On the screen, select print and find your model
- Wait patiently until the print is finished
- If the first layer is peeling off, perform bed leveling (ask for details on the #druk-3d channel)
- Wait until the bed cools below 40 degrees
- Remove your model from the bed using a spatula (do this carefully!)
- Clean the bed with IPA and paper towels
- Turn off the printer only when the head is below 65°C, or leave the printer on
3D Printer Ender Diagram
3D Printer Creality K1 Max Diagram
3D Printer Elegoo Neptune 4 Pro Diagram